操作範圍:Server 2003 ~ Server 2019 (適用Server OS系列)
適用產品:Kaspersky Security 11 for Windows Server
伺服器的硬體需求一般需求:
- l與 x86/64 相容的單核或多核系統
磁碟空間需求:
- 用於安裝所有應用程式元件:100 MB
- 用於下載和儲存病毒防護資料庫:2 GB(建議)
- 用於在隔離和備份儲存物件:400 MB(建議)
- 用於儲存記錄:1 GB(建議)
最低需求:
- 處理器:1.4 GHz 單核
- 記憶體:1 GB
- 磁碟:4 GB 可用空間
建議需求:
- 處理器:2.4 GHz 四核
- 記憶體:2 GB
- 磁碟:4 GB 可用空間
伺服器的軟體需求:
- Windows Server 2003 Standard / Enterprise / Datacenter SP2 或更高版本
- Windows Server 2003 R2 Foundation / Standard / Enterprise / Datacenter SP2 或更高版本
- Windows Server 2008 Standard / Enterprise / Datacenter SP1 或更高版本
- Windows Server 2008 Core Standard / Enterprise / Datacenter SP1 或更高版本
您可以在執行以下 64 位元 Microsoft Windows 作業系統的伺服器上安裝 Kaspersky Security for Windows Server:
- Windows Server 2003 Standard / Enterprise / Datacenter SP2 或更高版本
- Windows Server 2003 R2 Standard / Enterprise / Datacenter SP2 或更高版本
- Windows Server 2008 Core Standard / Enterprise / Datacenter SP1 或更高版本
- Windows Server 2008 Standard / Premium SP1 或更高版本
- Microsoft Small Business Server 2008 Standard / Premium
- Windows Server 2008 R2 Foundation / Standard / Enterprise / Datacenter SP1 或更高版本
- Windows Server 2008 R2 Core Standard / Enterprise / Datacenter SP1 或更高版本
- Windows Hyper-V Server 2008 R2 SP1 或更高版本
- Microsoft Small Business Server 2011 Essentials / Standard
- Microsoft Windows MultiPoint Server 2011 Standard / Premium
- Windows Server 2012 Foundation / Essentials / Standard / Datacenter
- Windows Server 2012 Core Foundation / Essentials / Standard / Datacenter
- Microsoft Windows MultiPoint Server 2012 Standard / Premium
- Windows Storage Server 2012
- Windows Hyper-V Server 2012
- Windows Server 2012 R2 Foundation / Essentials / Standard / Datacenter
- Windows Server 2012 R2 Core / Foundation / Essentials / Standard / Datacenter
- Windows Storage Server 2012 R2
- Windows Hyper-V Server 2012 R2
- Windows Server 2016 Essentials / Standard / Datacenter
- Windows Server 2016 MultiPoint
- Windows Server 2016 Core Standard / Datacenter
- Microsoft Windows MultiPoint Server 2016
- Windows Storage Server 2016
- Windows Hyper-V Server 2016
- Windows Server 2019 Essentials / Standard / Datacenter
- Windows Server 2019 Core
- Windows Storage Server 2019
- Windows Hyper-V Server 2019
在 Windows Server 2003 或 Windows Server 2003 R2 上安裝 Kaspersky Security for Windows Server 前,請下載並安裝 KB2868626 更新。
先行下載安裝應用程式。
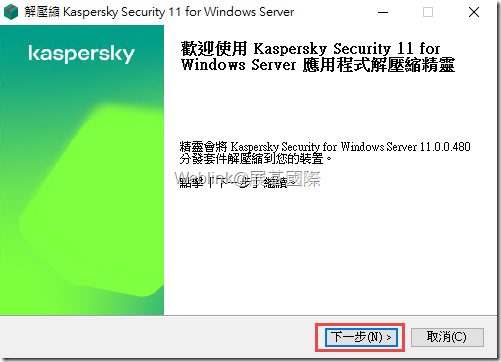
Step1. 點選安裝套件” ks4ws_11.0.0.480_zh-Hant”進行解壓縮。
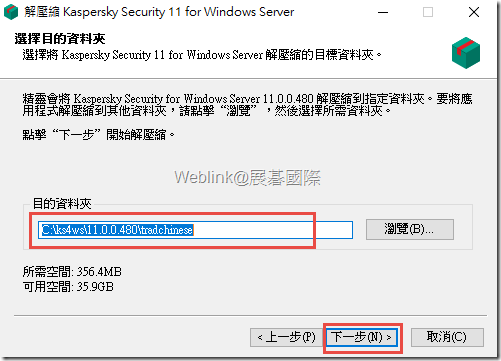
Step2. 預設解壓縮路徑:C:\ks4ws\11.0.0.480\tradchinese,點選下一步。
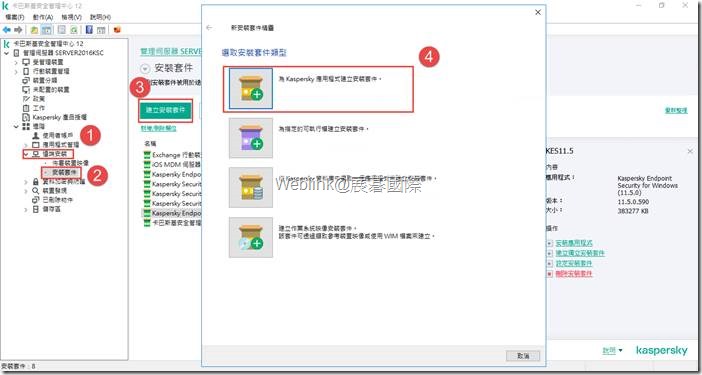
Step3. 將KSWS安裝套件,匯入套件至管理中心KSC中。
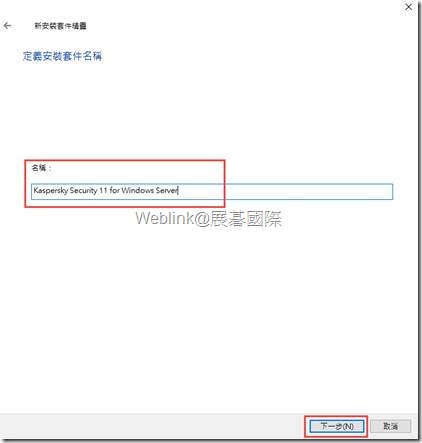
Step4. 定義安裝套件名稱以方便辨識,點選下一步。
Step5. 匯入附檔名為kud檔案,預設路徑:C:\ks4ws\10.1.1.746\tradchinese\server
Step6. 勾選同意條款,點選下一步。
Step7. 點選完成。
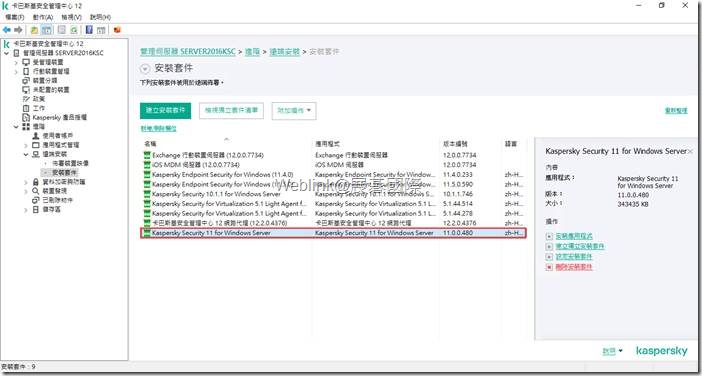
Step8. 確認安裝套件。
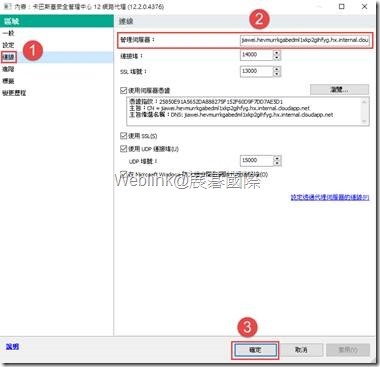
Step9. 檢查網路代理連線位子(重要!)
點選 遠端安裝 →安裝套件 →卡巴斯基安全管理中心 12 網路代理 →右鍵內容。
Step10. 網路代理連線方式,請確認”管理伺服器”連線位子DNS可否解析,如無法解析請給IP Address。
遠端佈署Agnet
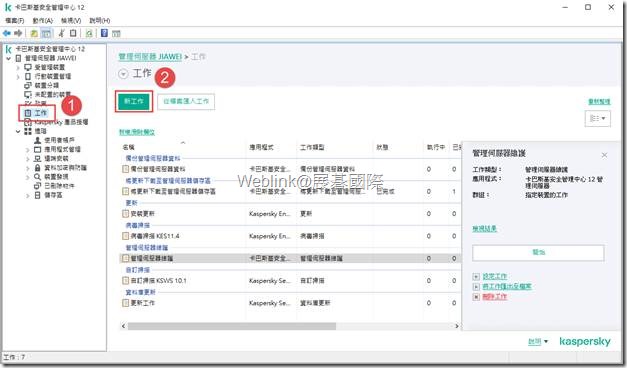
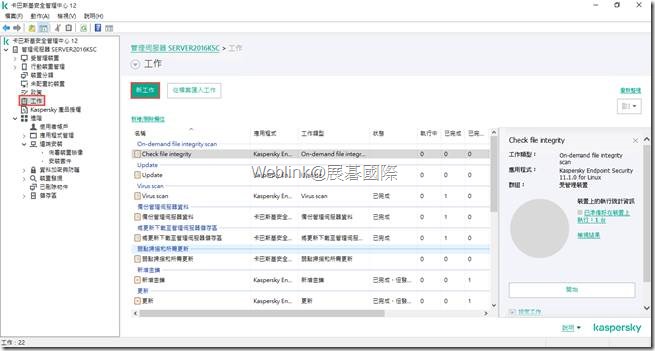
Step11. 建立遠端佈署Agent網路代理工作。
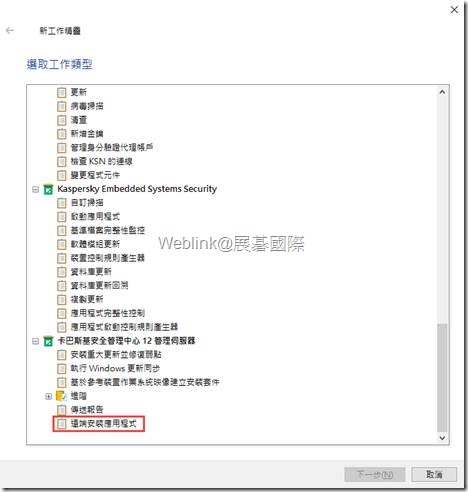
Step12. 點選遠端安裝應用程式,點選下一步。
Step13. 選擇卡巴斯基安全管理中心12網路代理,點選下一步。
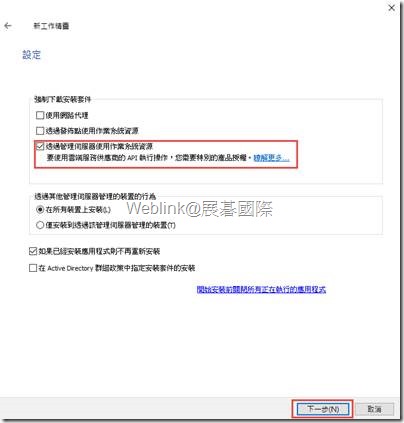
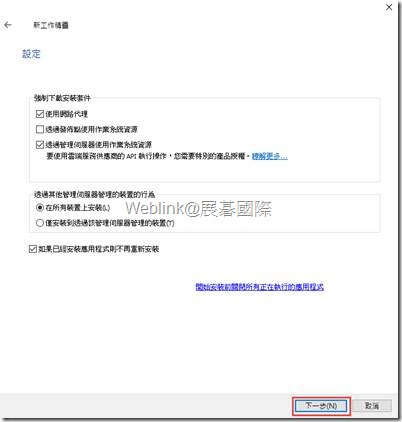
Step14. 請取消使用網路代理,保留透過管理伺服器使用作業系統資源→下一步。
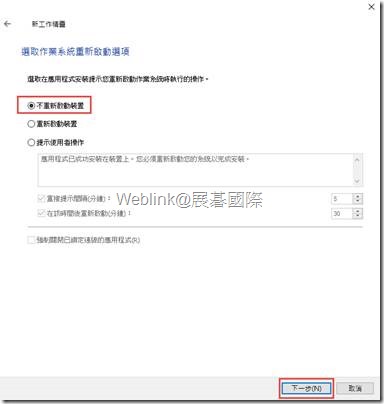
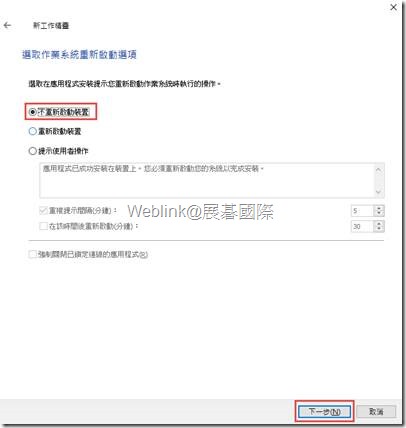
Step15. 選擇不重新啟動電腦→下一步。
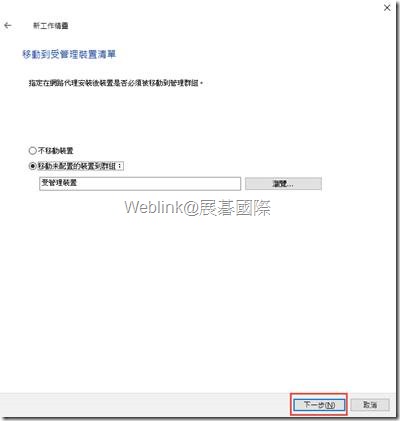
Step16. 在網路代理安裝後裝置是否必須移動到管理群組。
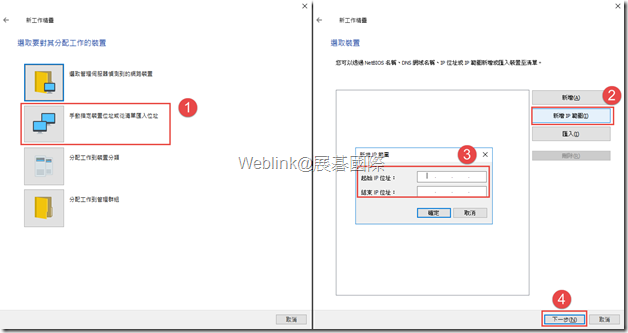
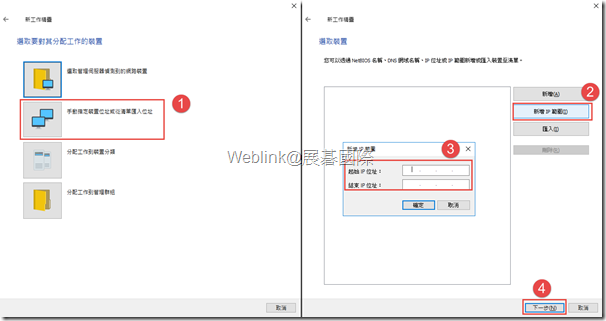
Step17. 選擇欲派送電腦IP 或DNS Name或整個IP區段 →下一步。( 該步驟視公司實際情況及需求則其一挑選目標電腦,下方圖示為範例 )
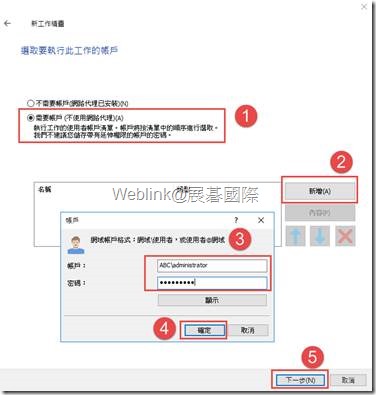
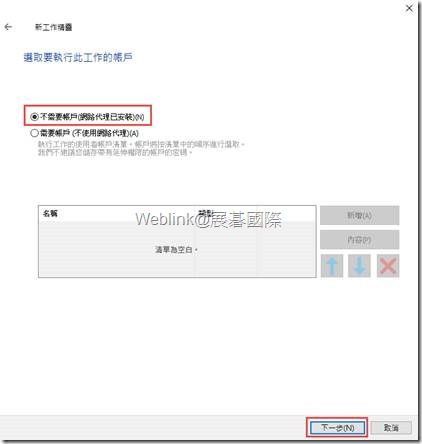
Step18. 選擇需要帳號,輸入網域管理員帳號及密碼請參考下圖範例 :
ABC\administrator或 administrator@abc.com
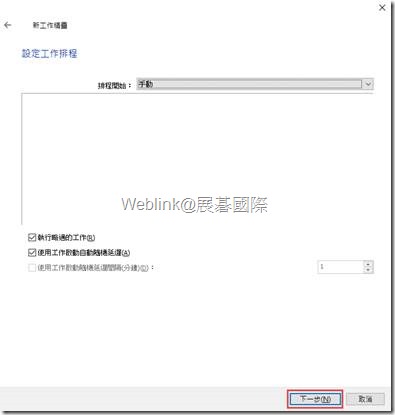
Step19. 選擇排程時間,若無特別需求預設即可→下一步。
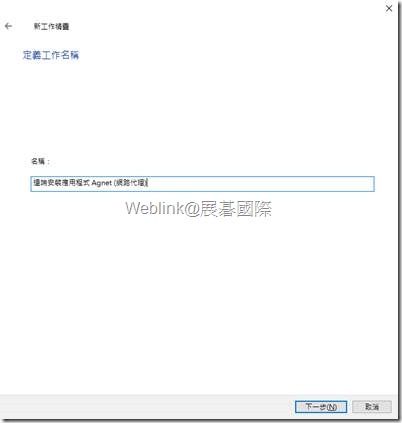
Step20. 輸入該工作顯示名稱,請以方便辨識為主,點選下一步。
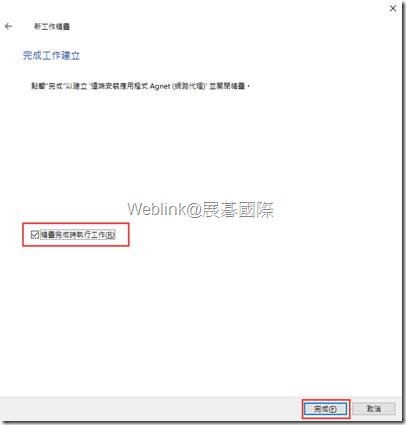
Step21. 勾選精靈完成後執行工作→下一步。
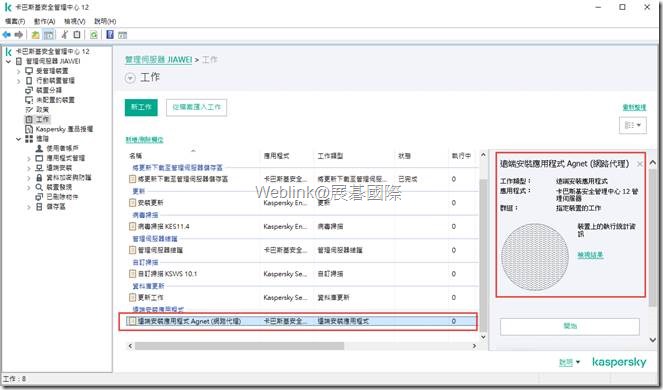
Step22. 等待安裝佈署完成。
Step23. 建立遠端佈署KES11.5工作。
Step24. 點選”遠端安裝應用程式”。
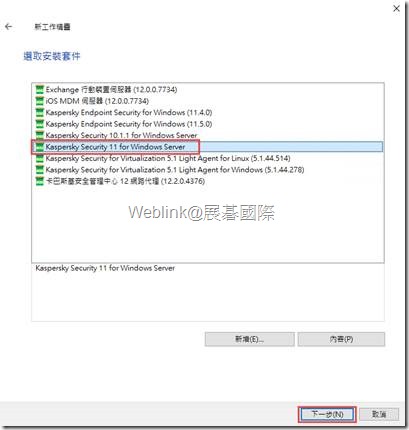
Step25. 點選KSWS11.1版本,點選下一步。
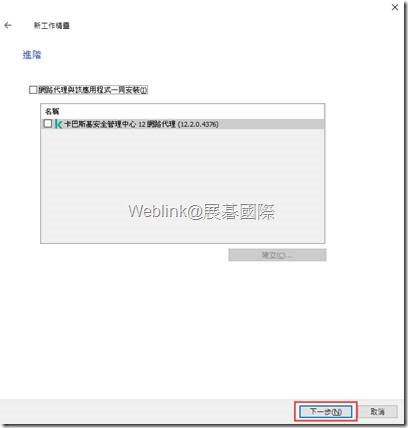
Step26. 已安裝過Agent無需再安裝,點選下一步。
Step27. 預設即可,點選下一步。
Step28. 若環境沒有他牌防毒軟體不需要重新啟動電腦,點選下一步。
Step29. 選擇欲派送電腦IP 或DNS Name或整個IP區段 →下一步。( 該步驟視公司實際情況及需求則其一挑選目標電腦,下方圖示為範例 )
Step30. 已有Agent不需要再輸入帳戶。
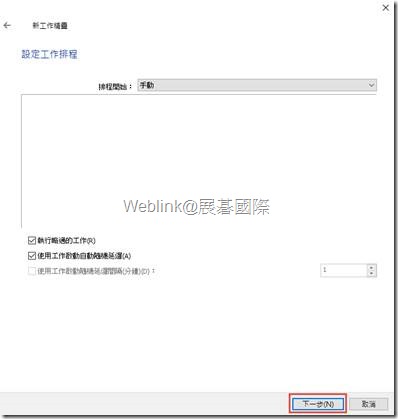
Step31. 安排工作排程,點選下一步。
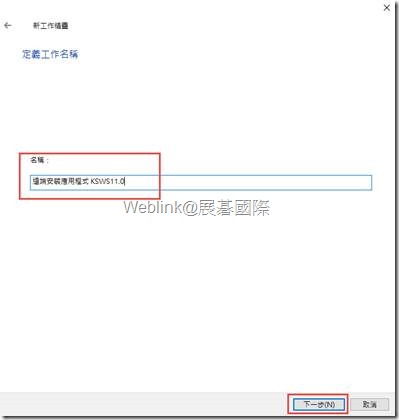
Step32. 給工作名稱,以方便辨識。
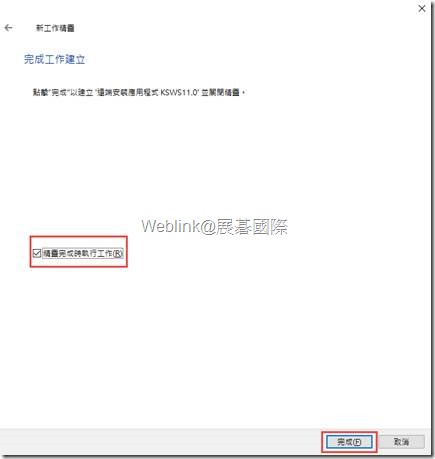
Step33. 建立工作完成後直接執行,點選完成。
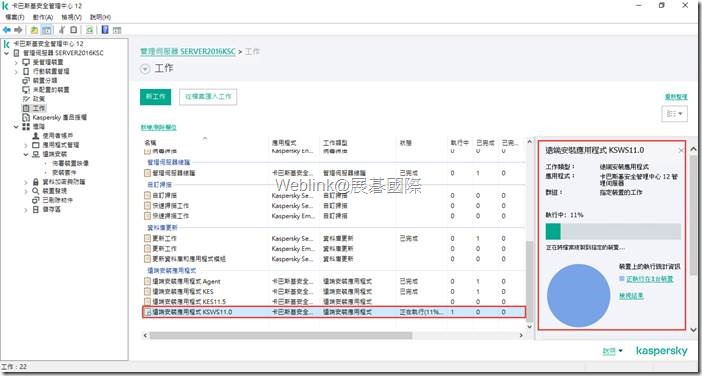
Step34. 等待佈署完成。

